Redis组件使用
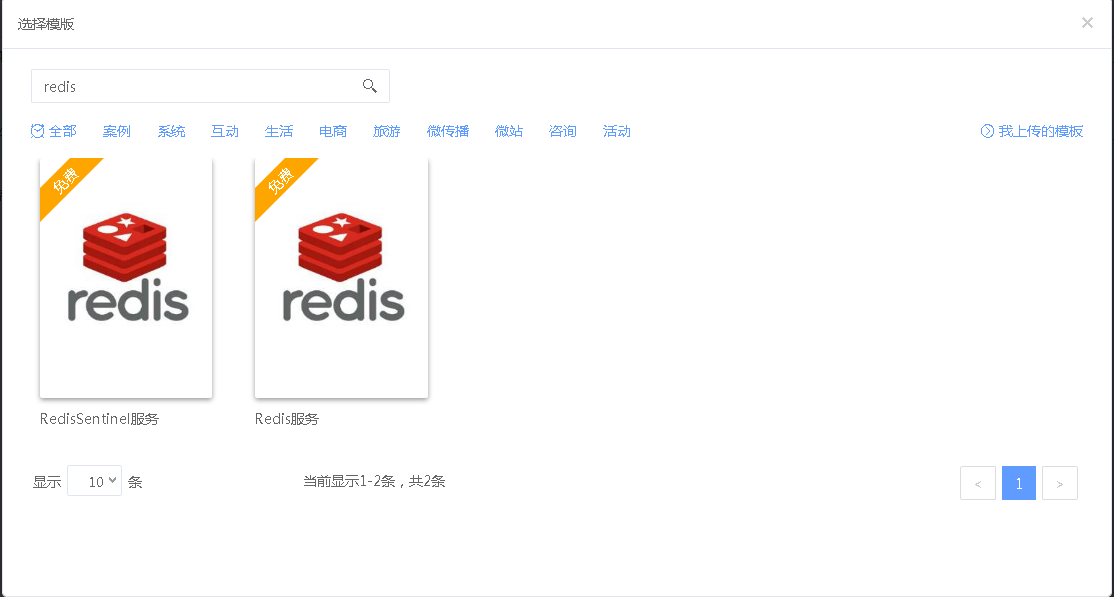
- 平台对Redis的集成提供了支持,同时支持单例、哨兵等多种模式; 并制作了单例和哨兵模式的模板,开发者选择对应的模板组件即可使用对应的模式。
- 平台推荐建立一个独立的租户来安装和部署Redis。
一、分组配置
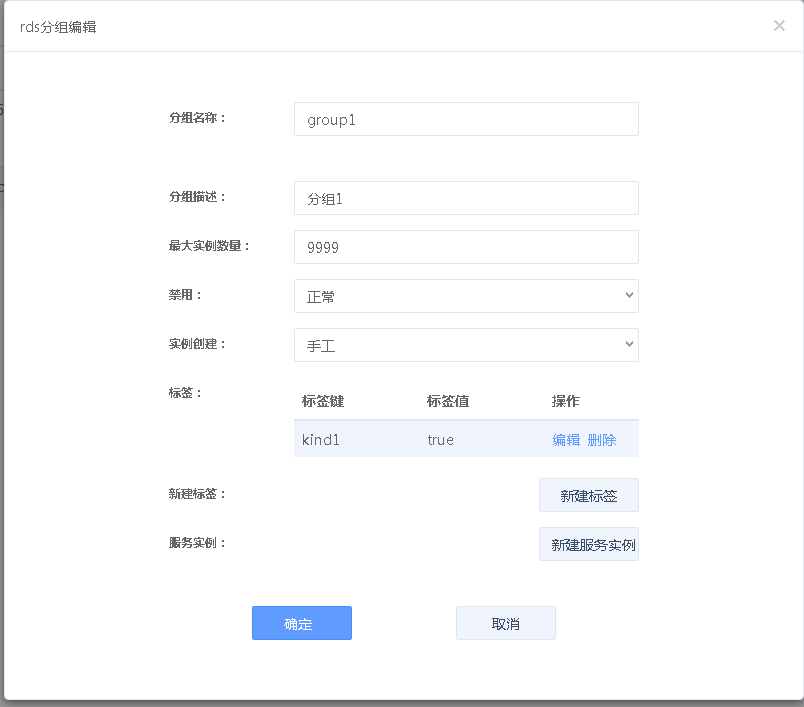
1. 新建分组
在system账户下打开资源管理下的“RDS服务管理(redis)”功能:
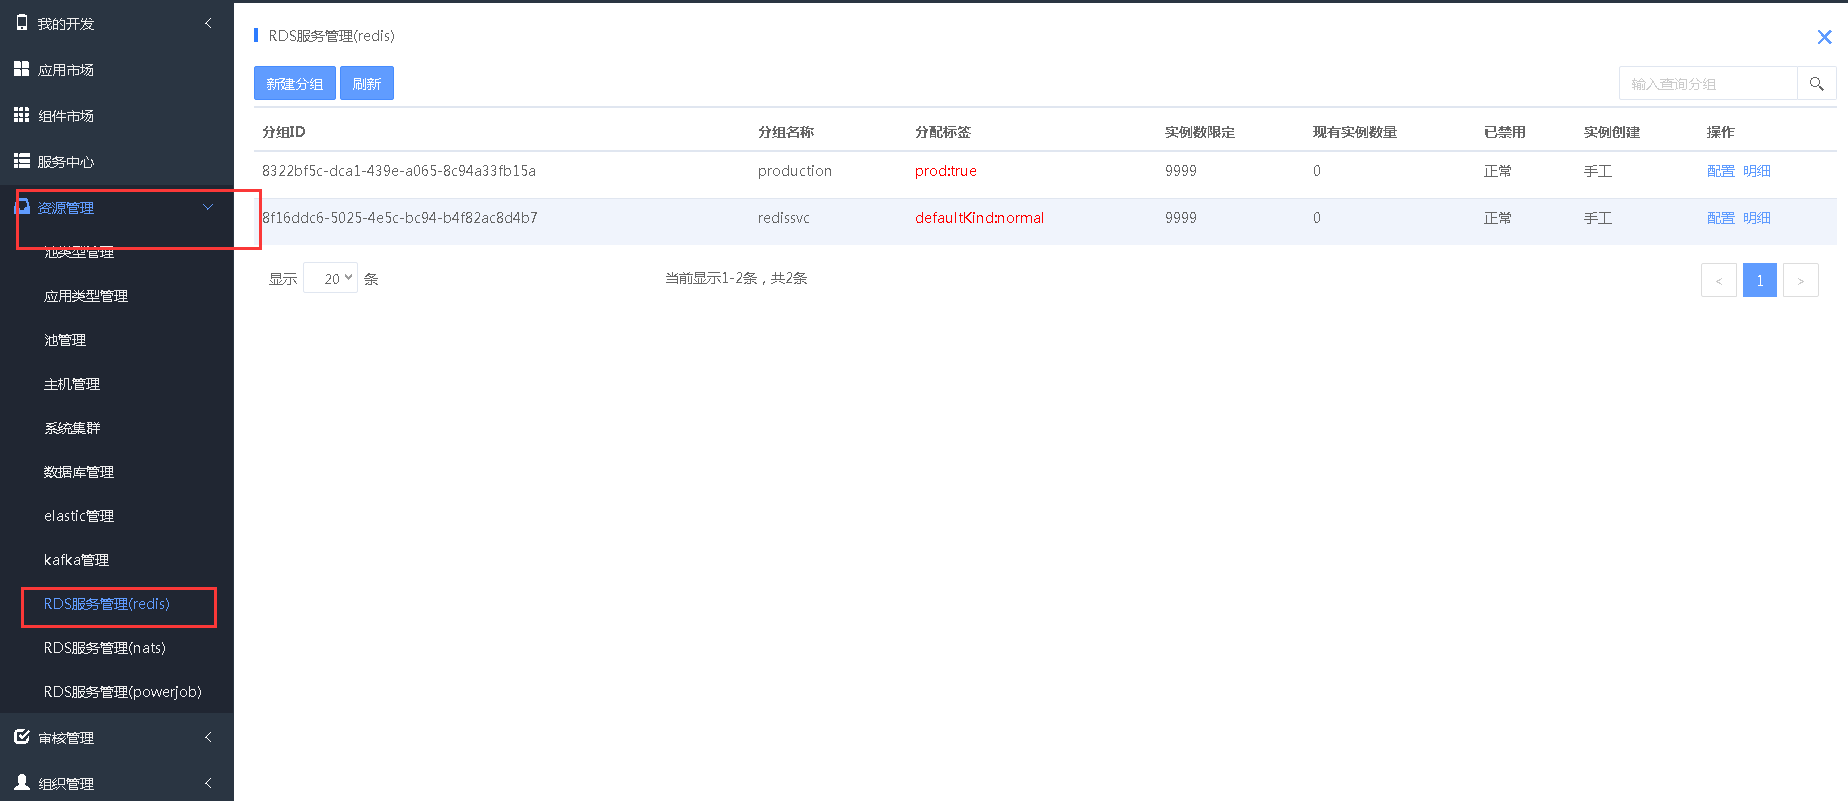
可以新建分组,分组中可以设置不同的标签,标签就是分组Hash,在架构图中可配置使用指定的分组标签; 如不配置,则使用默认的defaultKind:normal分组标签。
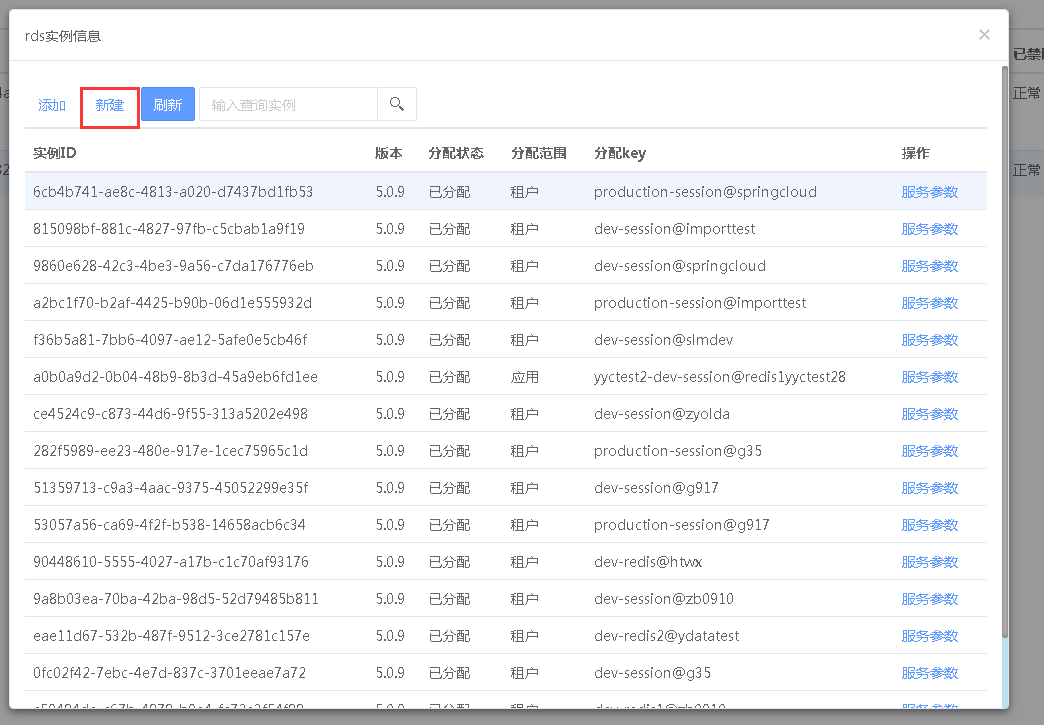
2. 新建实例
在分组中可以新建实例,一个实例就是一台redis服务器,可以新建多个实例供多租户多应用使用; 每个租户和应用使用时,系统会自动分配实例供其使用,开发者无需配置;
新建时输入实例数量,选择部署的租户和集群;
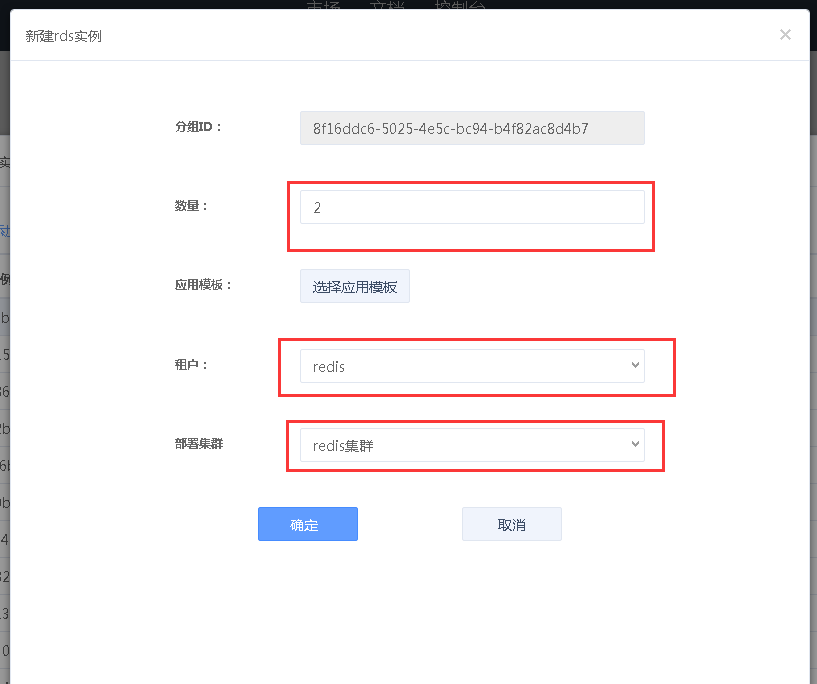
在创建实例时,平台提供了单例和哨兵的模板,点击“选择应用模板”可进行选择。
二、组件使用
1、添加组件
- 在架构市场添加redis组件
- 拖拽到架构图中:
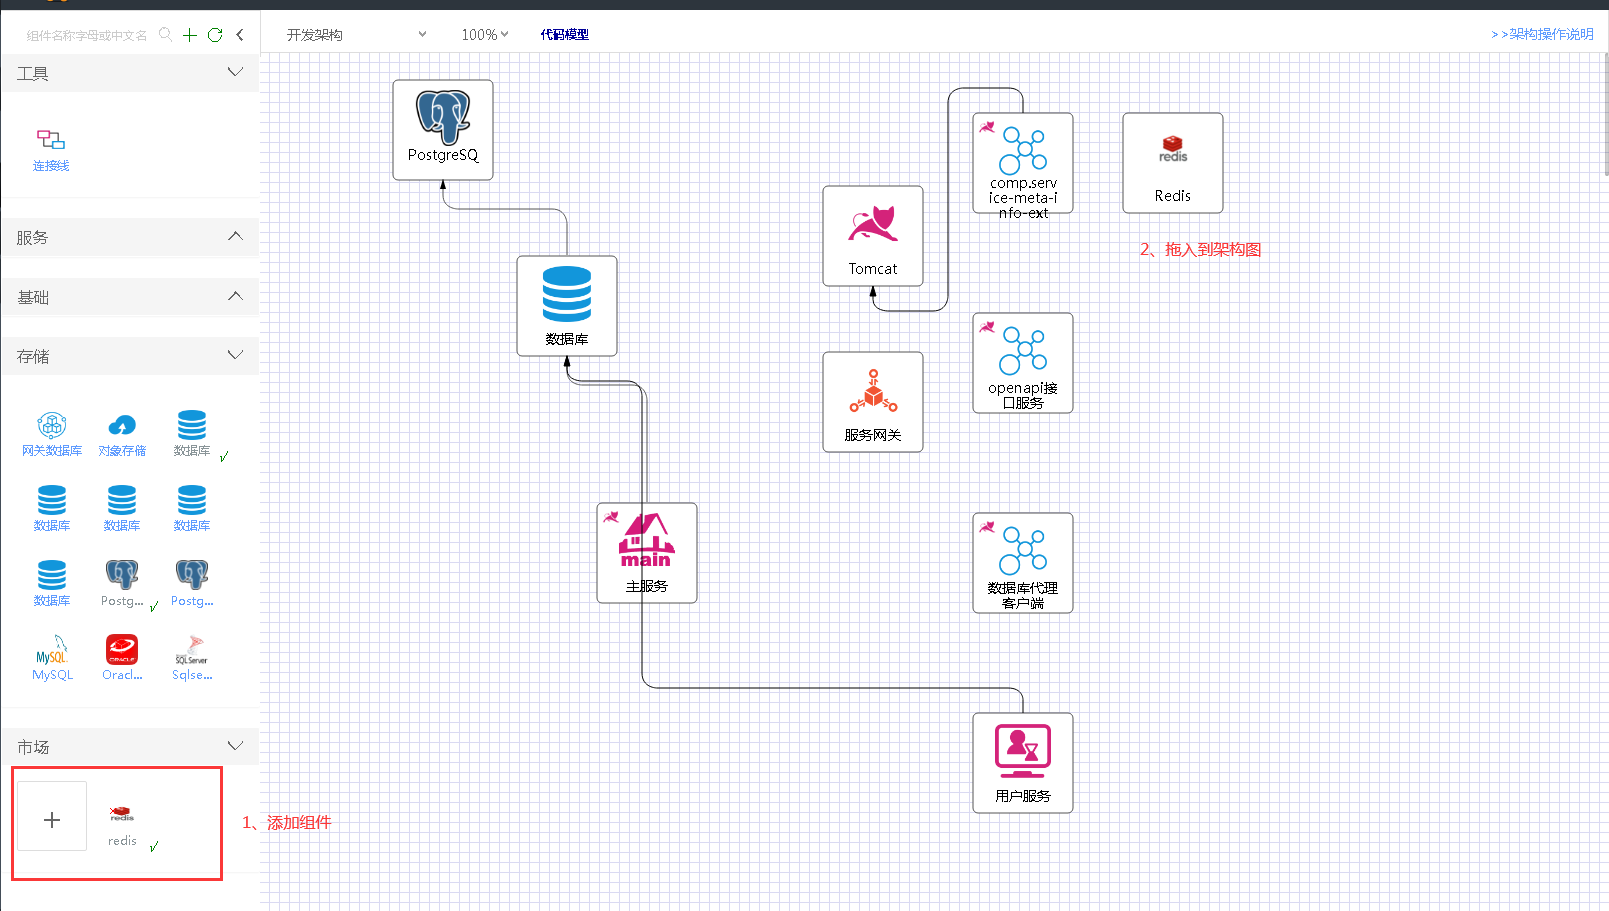
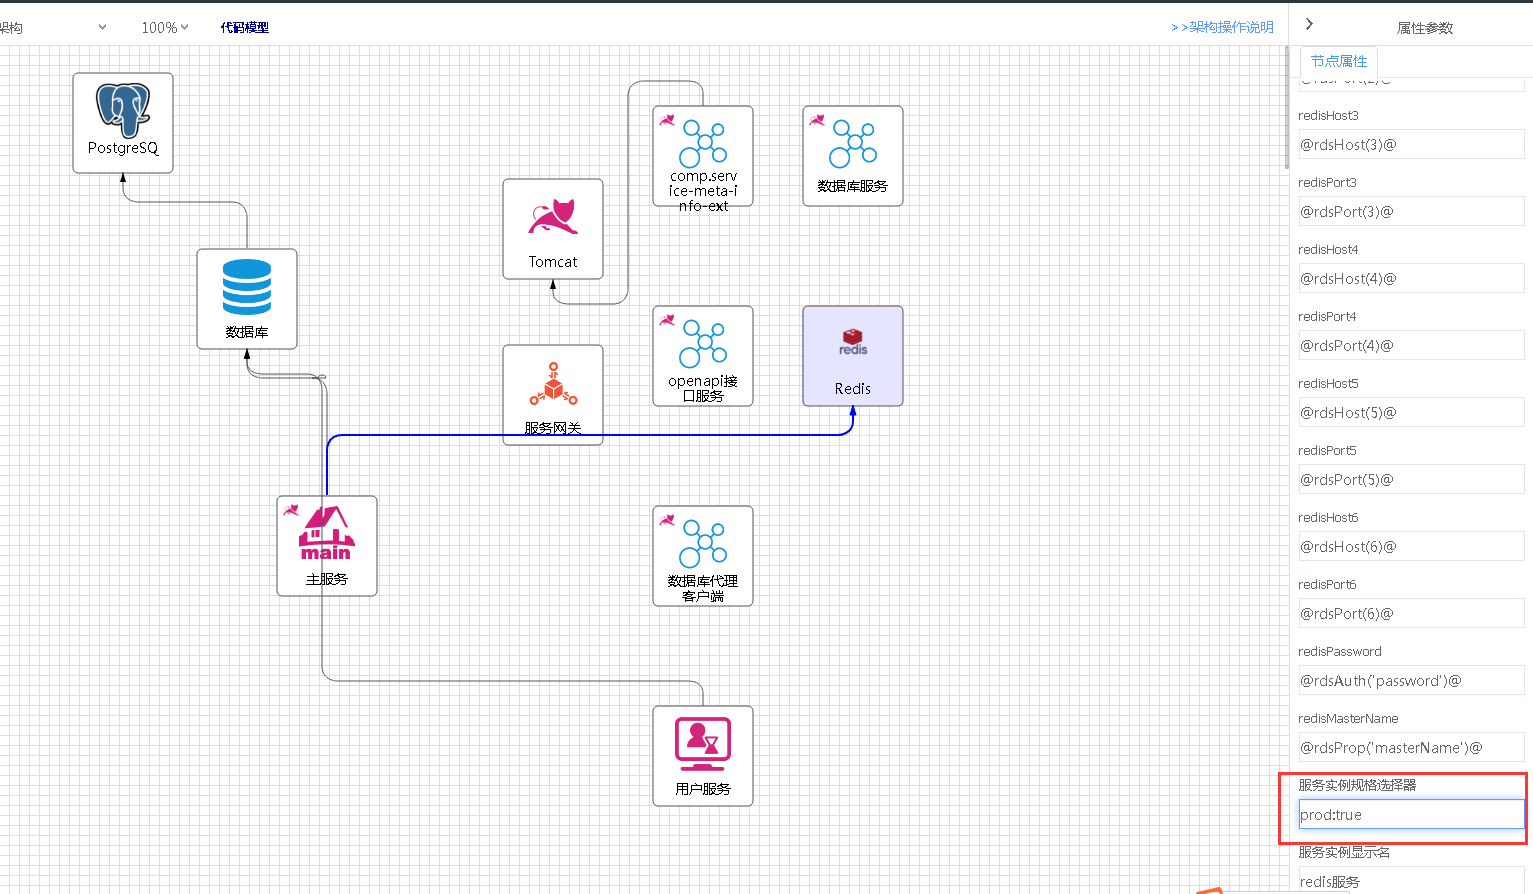
- 将主服务连接到redis组件,在服务实例规格选择器栏中可以录入配置好的分组标签,如不录入,则使用默认的defaultKind:normal分组
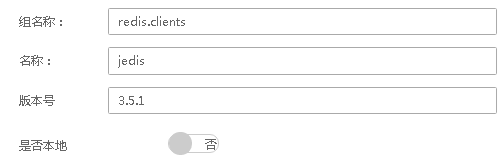
2、导入依赖
- 安装 Redis 的 java 驱动:
2、组件使用
- 编写驱动类
示例代码:
public class RedisHelper {

    public static Jedis getRedisClient() {
        String address = System.getenv("COMP_REDIS_REDISSERVICEADDRESS");
        if(StringUtils.isEmpty(address)) {
            address = System.getProperty("COMP_REDIS_REDISSERVICEADDRESS");
        }
        String auth = System.getenv("COMP_REDIS_REDISAUTH");
        if(StringUtils.isEmpty(auth)) {
            auth = System.getProperty("COMP_REDIS_REDISAUTH");
        }
        String host = address.substring(0, address.indexOf(":"));
        String port = address.substring(address.indexOf(":") + 1);
        String password = auth.substring(auth.indexOf("=") + 1);

        Jedis jedis = new Jedis(host, Integer.parseInt(port));
        jedis.auth(password);
        return jedis;
    }
}
- 编写redis操作api
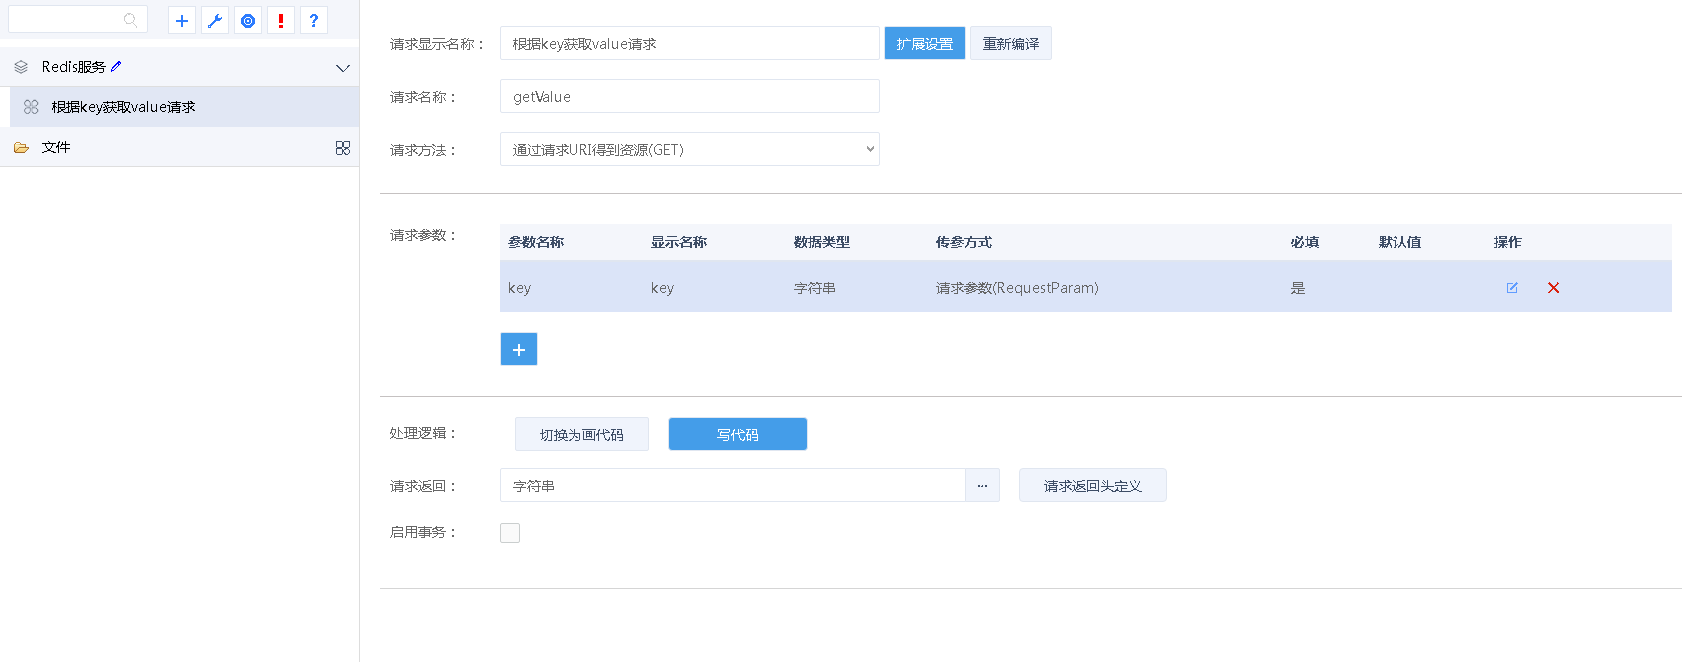
定义服务及请求:
示例代码:
public String getValue(String key) throws Exception {

    Jedis jedis = RedisHelper.getRedisClient();
    try {
        return jedis.get(key);
    } finally {
        jedis.close();
    }
}
- 在业务服务中调用
示例代码:
String prodPriceRedis = redisUserService.getValue(prodID);

redisUserService.setValue(prodID, priceJson);