系统配置
平台提供了系统配置组件及类库,用于存储及获取配置信息。支持按组织配置,下级组织继承上级组织的配置。并且可以扩展为其他路径配置
配置表结构
系统配置存储在config表中,结构如下,其中配置、分组、路径和服务联合唯一
| 列 | 模型名 | 字段名 | 说明 |
|---|---|---|---|
| 主键 | id | id | ID |
| 配置 | name | name | 配置 |
| 配置名称 | label | label | 配置的描述 |
| 配置内容 | content | content | 配置的内容,JSON格式,一个配置可以包含多个配置项 |
| 分组 | grouping | grouping | 用户自定义 |
| 路径 | path | path | 以/分隔的路径,路径上定义的配置,路径的下级节点可继承该配置 |
| 路径名称 | pathLabel | path_label | 路径的描述 |
| 标签 | tag | tag | 用户自定义 |
| 服务 | service | service | 配置对应的应用名,系统提供的配置大多属于企业门户entry |
配置内容可以通过配置一个配置结构,实现界面编辑,配置结构存储在config_schema表中,结构如下,其中配置和服务联合唯一
| 列 | 模型名 | 字段名 | 说明 |
|---|---|---|---|
| 主键 | id | id | 主键 |
| 配置 | name | name | 配置 |
| 配置名称 | label | label | 配置的描述 |
| 配置结构 | schemaContent | schema_content | 配置的结构,符合formRender规范的JSON格式 |
| 标签 | tag | tag | 用户自定义 |
| 服务 | service | service | 配置对应的应用名,系统提供的配置大多属于企业门户entry |
存储配置
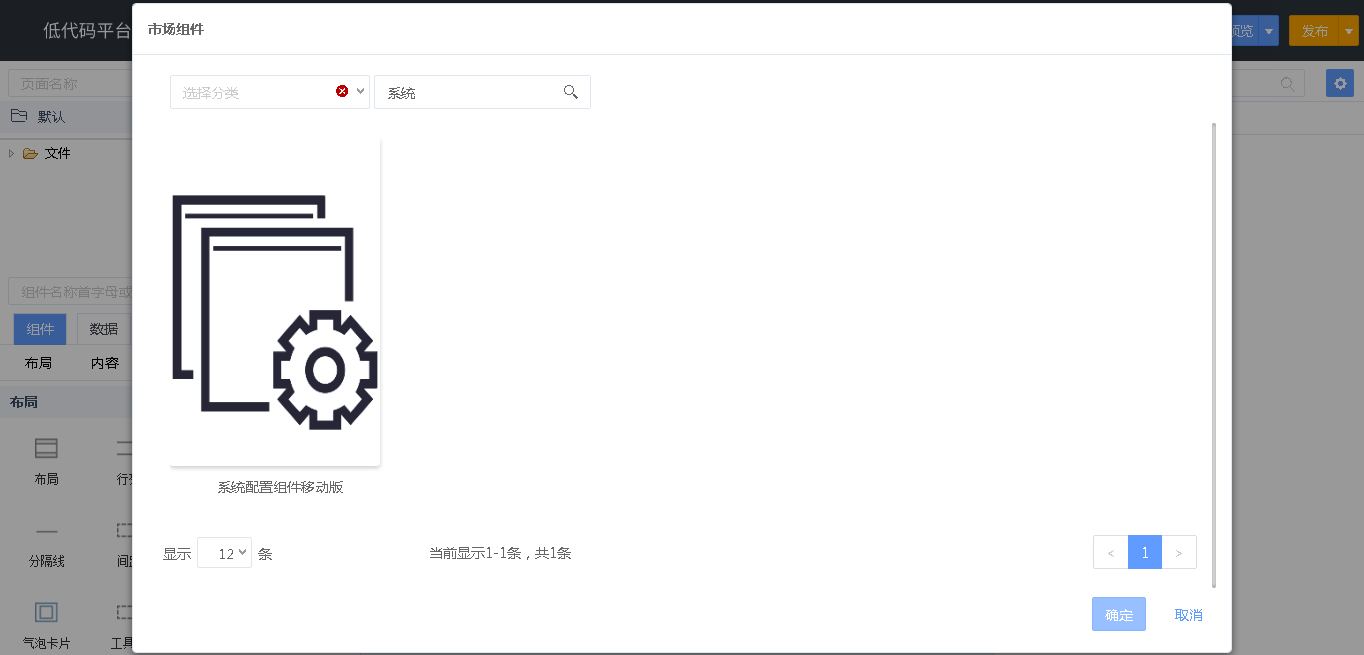
使用config组件存储配置,从市场下载系统配置组件
在页面中添加该组件,同时添加组件中的系统配置数据集
从系统配置数据集刷新后事件中,获取配置信息
//commonConfigData为系统配置数据集
var commonConfigData = this.comp("commonConfigData");
var pageData = this.comp("pageData");
commonConfigData.each(function(option){
var content = option.row.val("content");
if(content){
var json = JSON.parse(content);
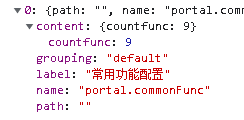
if(option.row.val("name")=="portal.commonFunc"){
pageData.setValue("funcCount",json.countfunc);
}
}
});
保存时写入系统配置数据集
        var commonConfigData = this.comp("commonConfigData");
        var rows = commonConfigData.find(["name"],["portal.commonFunc"]);
        if(rows.length==0){
            commonConfigData.newData({defaultValues:[{
                "name" : "portal.commonFunc",
                "content" : JSON.stringify({"countfunc":countfunc}),
                "grouping" : "",
                "label" : "常用功能配置",
                "service" : this.getServiceName()
            }]});
        }else{
            commonConfigData.setValue("content",JSON.stringify({"countfunc":countfunc}));
        }
        if(commonConfigData.isChanged()){
            commonConfigData.saveAllData().then(function(){
                justep.Util.hint("常用功能显示个数设置成功!");
            },function(err){
                throw err
            });
        }
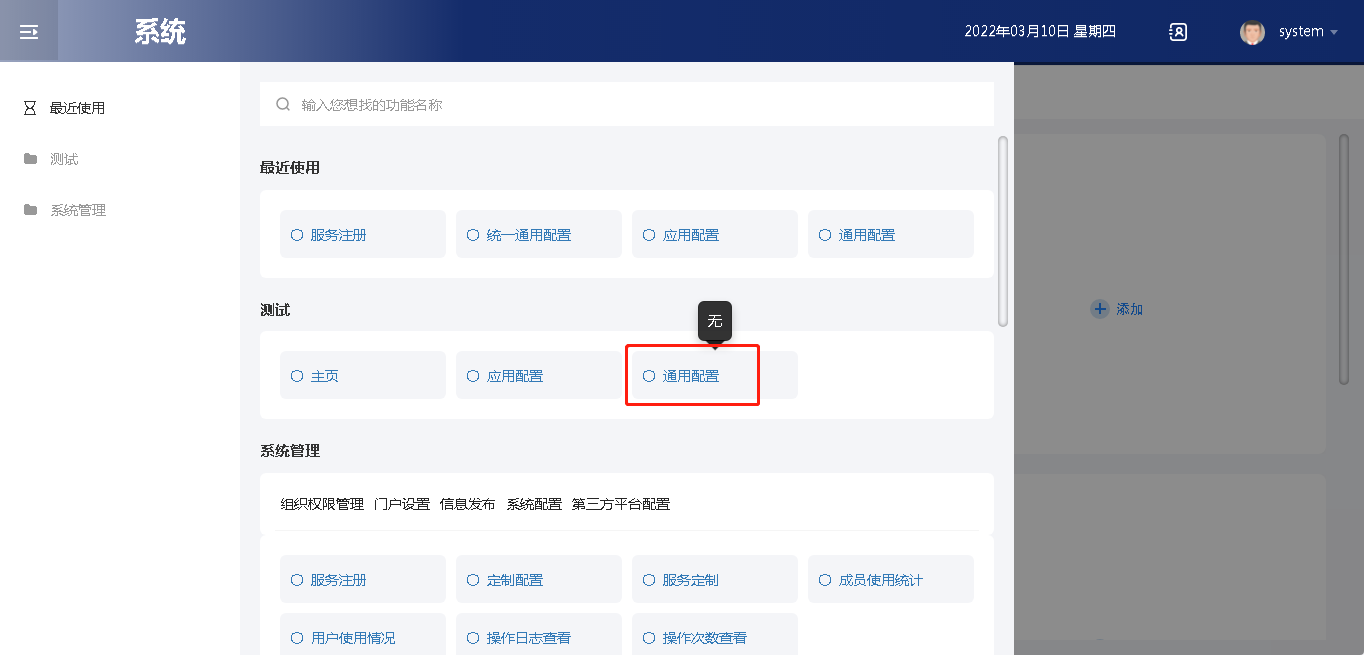
添加组件后,会自动添加这些配置页面
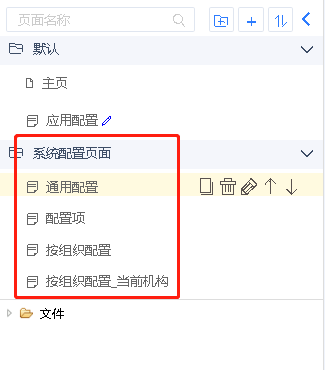
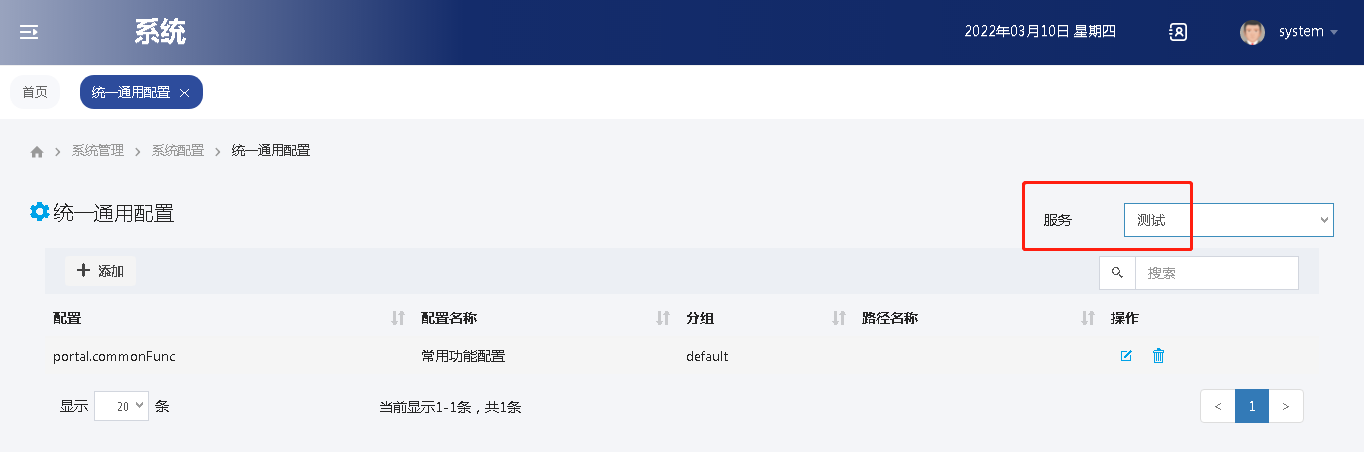
在门户的统一配置项、统一通用配置等功能中出现的页面就是这些在应用中的配置页面,可以自定义页面,以便进行更贴近应用的配置
由于系统配置页面这个目录的目录名为configDialog,包含dialog,系统不会为其下的w文件生成serviceMetaInfo文件,所以这些页面默认不会显示出来,如果需要单独显示,可以手动增加serviceMetaInfo文件
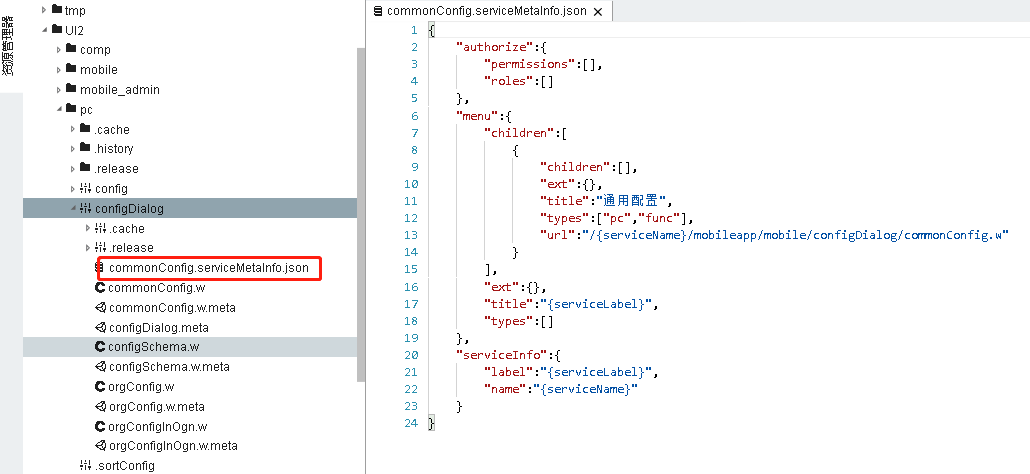
添加了serviceMetaInfo文件的页面,就能在功能树上显示出来了
获取配置
js库
企业桌面端和移动端引用的js库为 model/UI2/wxsys/lib/base/config.js 经典桌面端的js库为 model/UI2/system/lib/base/config.js
js库提供两个方法
- 获取配置 getConfig(serviceName,name,grouping,path,range)
- 按组织获取 getOrgConfig(serviceName,name,grouping,path,range)
- 参数说明
- serviceName:服务,必填,用于请求路径和sql查询
- name:配置,可以指定为模糊查询。传入123查询name=123的配置,传入123%查询name like 123%的配置
- grouping:分组,用于sql查询
- path:路径,支持传入多个,逗号分隔。作为getOrgConfig的参数时,path指组织的fid或id,如果传入的是人员id,查找配置的顺序为,先找人员的配置,然后找主岗的配置
- range:范围,path参数不为空时生效,self取自身,nearest取最近,all取全部,默认为nearest
- 返回结果为JSON数组
- name:配置
- label:配置名称
- grouping:分组
- content:配置内容,JSON格式
- path:路径
移动端使用案例——获取常用功能个数
import Config from "$UI/wxsys/lib/base/config"

    Config.getConfig("entry","portal.commonFunc").then(function(data){
        if (data.length > 0){
            var content = data[0].content;
            if(content && content.countfunc){
                self.limit = content.countfunc
            }
        }
        var data = self.comp("countData");
        data.refreshData();
    },function(error){
        throw error;
    });
经典桌面端使用案例——获取常用功能个数
var Config = require("$UI/system/lib/base/config");

    Config.getConfig("entry","portal.commonFunc").then(function(data){
    if(data.length>0){
        var content = JSON.parse(data[0].content);
        if(content && content.countfunc){
        self.limit = content.countfunc;
        }
    }
        var data = self.comp("countData");
        data.refreshData();
    },function(error){
        throw error;
    });
java库
java库为 com.justep.util.ConfigUtil,提供两个方法
- 获取配置 JSONArray getConfig(String service,String name,String grouping,String path,String range)
- 按组织获取 JSONArray getOrgConfig(String service,String name,String grouping,String path,String range)
- 参数说明
- service 服务,传null表示获取当前应用的配置
- name:配置,可以指定为模糊查询。传入123查询name=123的配置,传入123%查询name like 123%的配置
- grouping:分组,用于sql查询
- path:路径,支持传入多个,逗号分隔。作为getOrgConfig的参数时,path指组织的fid或id,如果传入的是人员id,查找配置的顺序为,先找人员的配置,然后找主岗的配置
- range:范围,path参数不为空时生效,self取自身,nearest取最近,all取全部,默认为nearest
- 返回结果为JSON数组
- name:配置
- label:配置名称
- grouping:分组
- content:配置内容,JSON格式
- path:路径
获取配置使用案例——获取开启双重认证配置
    JSONArray configs = ConfigUtil.getConfig(null,"use-two-factor-login",null,null,null);
    if(configs.size()>0) {
        JSONObject config = configs.getJSONObject(0);
        JSONObject items = config.getJSONObject("content");
        Boolean login = items.getBoolean("twoFactorLogin");
        return login;
    }
按组织获取使用案例——获取当前登录者的双重认证白名单配置
    JSONArray configs = ConfigUtil.getOrgConfig(null,"two-factor-login",null,userId,null);
    if(configs.size()>0) {
        JSONObject config = configs.getJSONObject(0);
        JSONObject items = config.getJSONObject("content")
        Boolean login = items.getBoolean("twoFactorLogin");
        return login;
    }
配置项定义
formRender模板
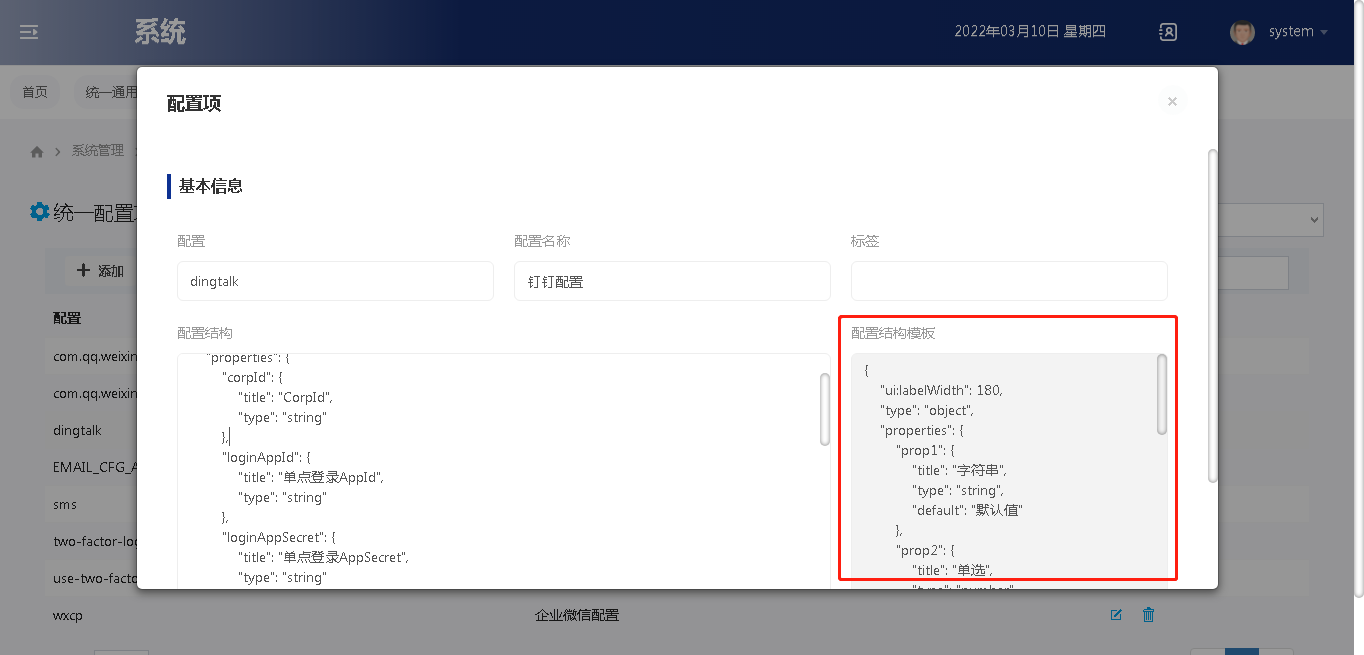
每个配置可以定义不同的配置页面,例如下图为钉钉的配置界面
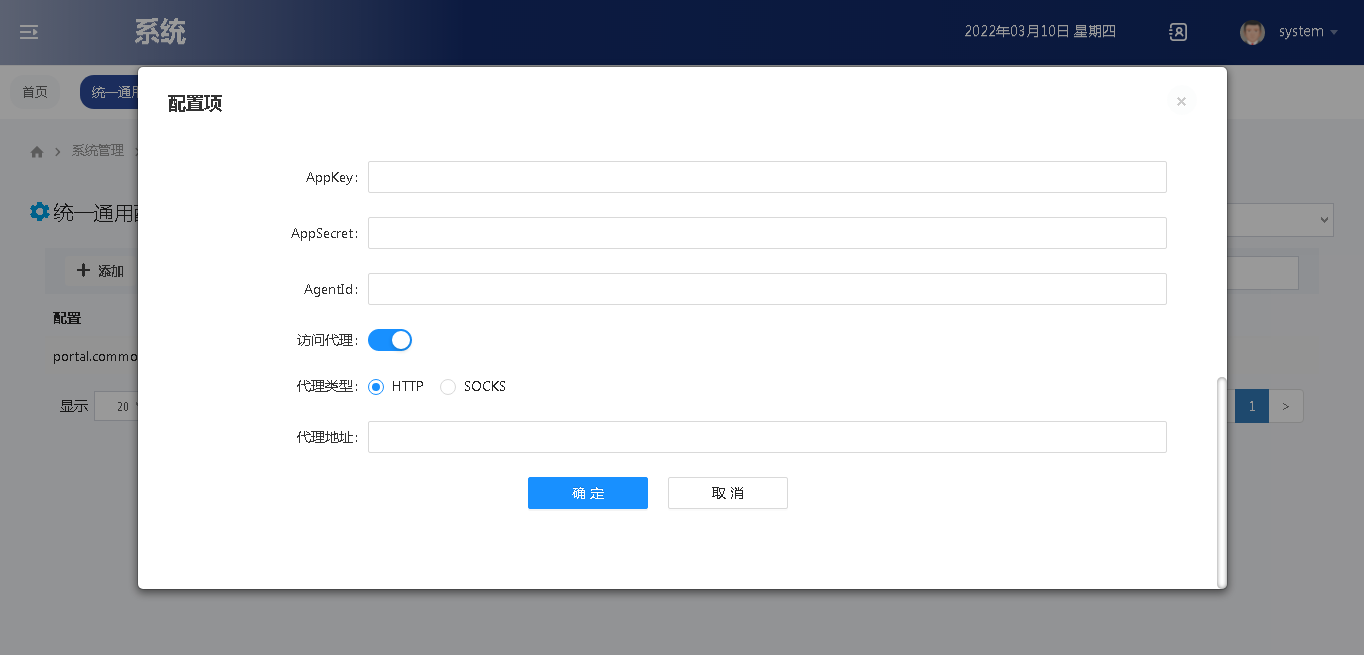
下图为短信的配置界面
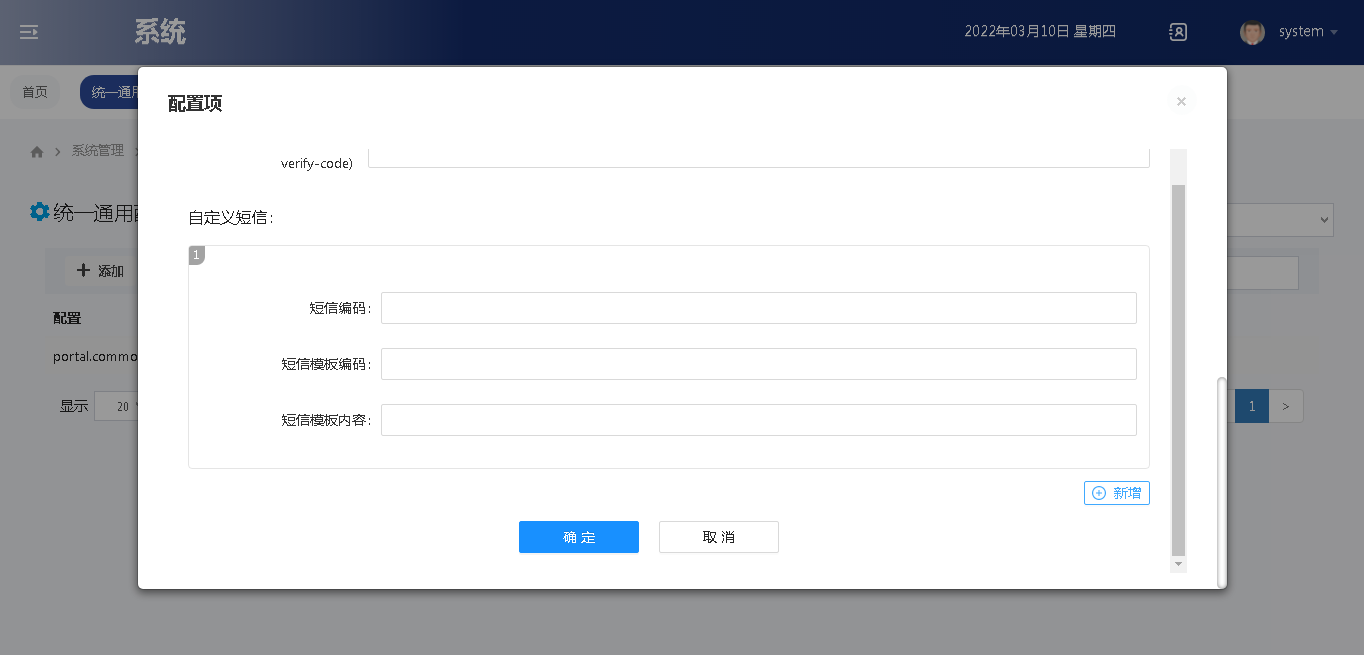
这样的配置页面,是通过JSON数据配置出来的
下面是钉钉的配置JSON
{
    "ui:labelWidth": 180,
    "type": "object",
    "properties": {
        "corpId": {
            "title": "CorpId",
            "type": "string"
        },
        "loginAppId": {
            "title": "单点登录AppId",
            "type": "string"
        },
        "loginAppSecret": {
            "title": "单点登录AppSecret",
            "type": "string"
        },
        "appKey": {
            "title": "AppKey",
            "type": "string"
        },
        "appSecret": {
            "title": "AppSecret",
            "type": "string"
        },
        "agentId": {
            "title": "AgentId",
            "type": "string"
        },
        "enableProxy": {
            "title": "访问代理",
            "type": "boolean",
            "default": true,
            "ui:widget": "switch"
        },
        "proxyType": {
            "title": "代理类型",
            "type": "string",
            "default": "HTTP",
            "enum": [
                "HTTP",
                "SOCKS"
            ],
            "ui:widget": "radio"
        },
        "proxyAddr": {
            "title": "代理地址",
            "type": "string"
        }
    }
}
下面是短信的配置JSON
{
    "ui:labelWidth": 180,
    "type": "object",
    "properties": {
        "type": {
            "title": "短信服务商",
            "type": "string",
            "ui:widget": "radio",
            "items": {
                "type": "string"
            },
            "enum": [
                "NEWDAO",
                "ALIBABA",
                "TENCENT",
                "CHUANGLAN",
                "EMAY"
            ],
            "enumNames": [
                "内置短信(仅限开发,测试部署环境使用)",
                "阿里云通信",
                "腾讯云短信",
                "创蓝短信",
                "亿美软通短信"
            ]
        },
        "apiKey": {
            "title": "Access Key ID",
            "description": "验证码API账号,通知API账号",
            "type": "string"
        },
        "apiSecret": {
            "title": "Access Key Secret",
            "description": "验证码API密码,通知API密码",
            "type": "string"
        },
        "freeSignName": {
            "title": "短信签名",
            "type": "string"
        },
        "smsUrl": {
            "title": "短信地址",
            "type": "string"
        },
        "sms-user-reg": {
            "title": "注册验证码模板(sms-user-reg)",
            "type": "string"
        },
        "sms-password-reset": {
            "title": "修改密码验证码模板(sms-password-reset)",
            "type": "string"
        },
        "sms-verify-code": {
            "title": "通用验证码模板(sms-verify-code)",
            "type": "string"
        },
        "smsDefines": {
            "title": "自定义短信",
            "type": "array",
            "widget": "tableList",
            "items": {
                "type": "object",
                "properties": {
                    "smsCode": {
                        "title": "短信编码",
                        "type": "string"
                    },
                    "templateCode": {
                        "title": "短信模板编码",
                        "type": "string"
                    },
                    "templateContent": {
                        "title": "短信模板内容",
                        "type": "string"
                    }
                }
            }
        }
    }
}
在配置项编辑页面上显示了一个配置结构模板,首次添加配置结构时,将模板内容复制到配置结构中,再进行修改。模板中列出了4种常用的模板(输入、单选、多选、开关),更多模板参考 https://x-render.gitee.io/form-render
平台扩展
在formRender的JSON中,增加ext节点,用来实现扩展能力
- protect:设置受保护的配置项,在前端获取该配置时,获取不到受保护的配置项
- personOption:配置的path存人员id还是人员成员id,有些配置以人为主,不管在哪个岗位下,都使用人员的配置时使用。可选项为person或personMember。不设置表示存人员成员id
- asNamePart:将某个属性的值添加到配置name中,形成name--属性值的新name,用于设置多个同类型的配置
设置protect的案例,设置appSecret和appKey为受保护的配置
{
    "ui:labelWidth": 180,
    "type": "object",
    "properties": {
        "appKey": {
            "title": "AppKey",
            "type": "string"
        },
        "appSecret": {
            "title": "AppSecret",
            "type": "string"
        },
        "agentId": {
            "title": "AgentId",
            "type": "string"
        },
        "enableProxy": {
            "title": "访问代理",
            "type": "boolean",
            "default": true,
            "ui:widget": "switch"
        }
    },
    "ext":{
        "protect":["appKey","appSecret"]
    }
}
设置personOption的案例,双重认证白名单将配置设置到人员上
{
    "ui:labelWidth": 180,
    "type": "object",
    "properties": {
        "twoFactorLogin": {
            "title": "开启双重认证",
            "type": "boolean",
            "default": false,
                        "ui:widget":"switch"
        }
    },
    "ext": {
        "personOption": "person"
    }
}
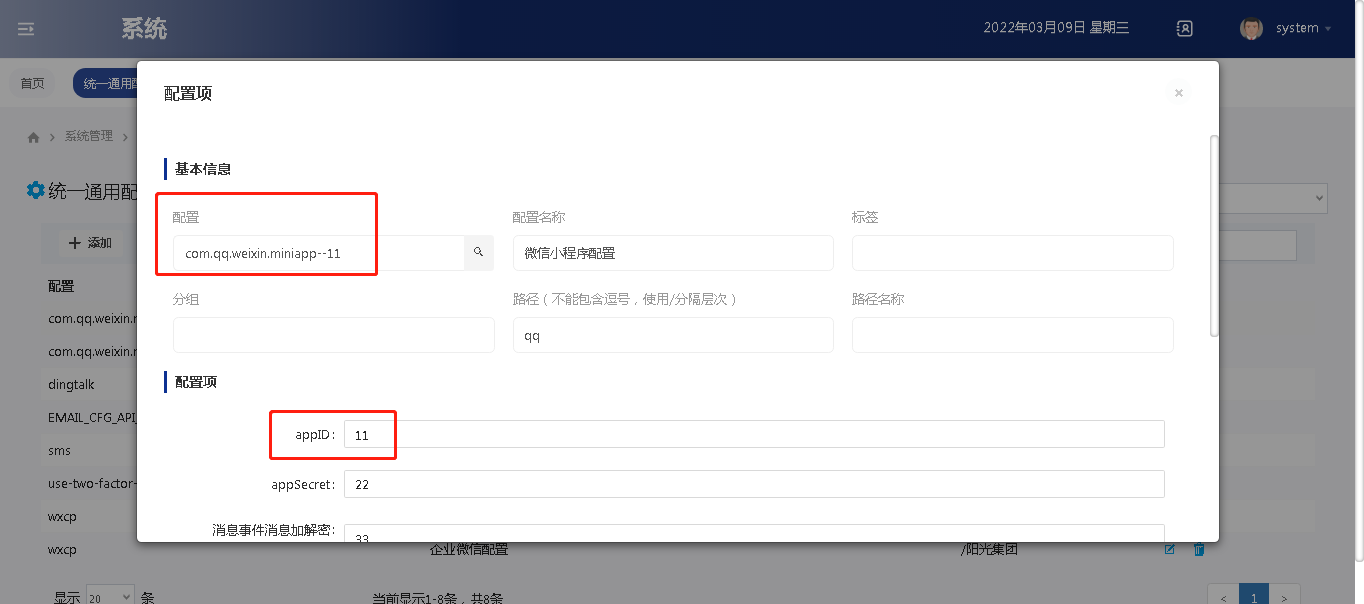
设置asNamePart的案例,系统支持配置多个微信小程序,每个配置的name为 com.qq.weixin.miniapp--appID的形式
{
    "ui:labelWidth": 180,
    "type": "object",
    "properties": {
        "appID": {
            "title": "appID",
            "type": "string"
        },
        "appSecret": {
            "title": "appSecret",
            "type": "string"
        },
        "token": {
            "title": "消息事件消息加解密token",
            "type": "string"
        },
        "encodingAESKey": {
            "title": "消息事件消息加解密encodingAESKey",
            "type": "string"
        },
        "notifyUrl": {
            "title": "微信推送消息解密后通知地址",
            "type": "string"
        }
    },
    "ext":{
        "asNamePart":"appID"
    }
}
配置后的效果