门户V2定制-自定义登录Url
场景描述
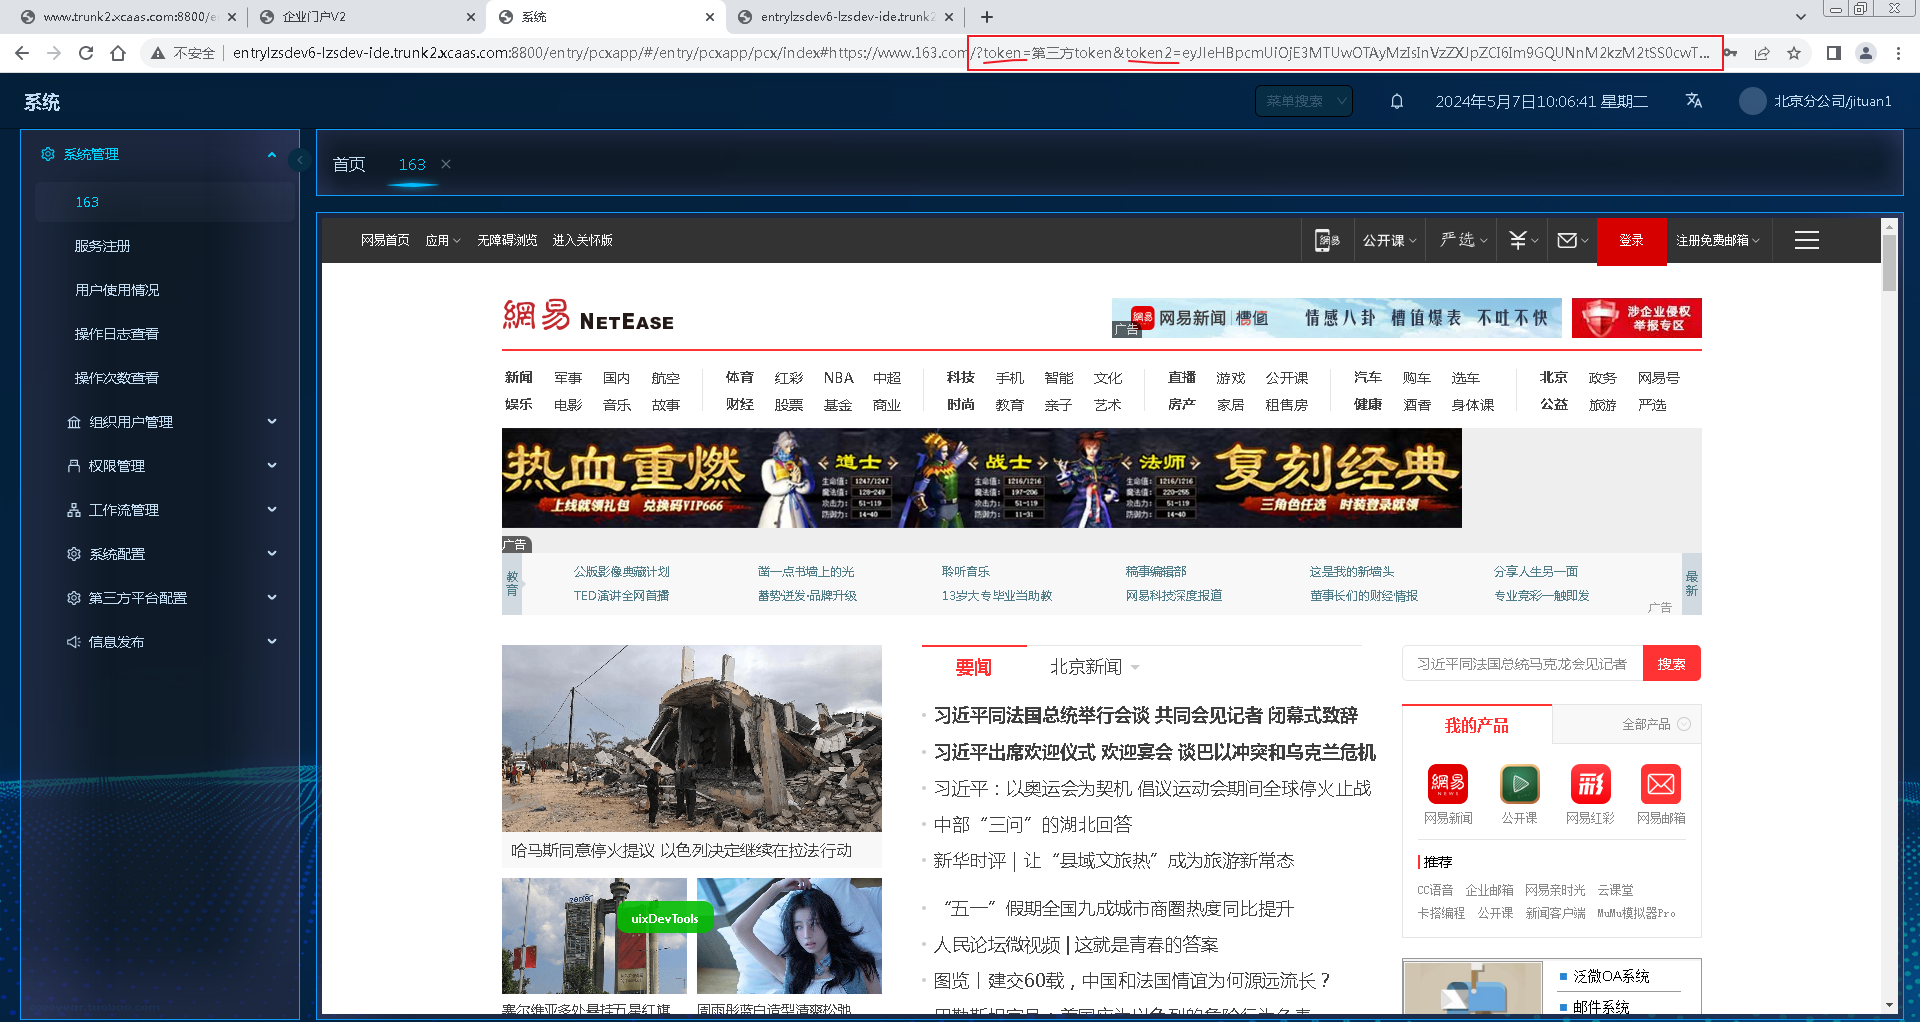
企业门户V2修改登录url为自定义地址,且对应第三方系统带平台token及第三方系统token
实现思路
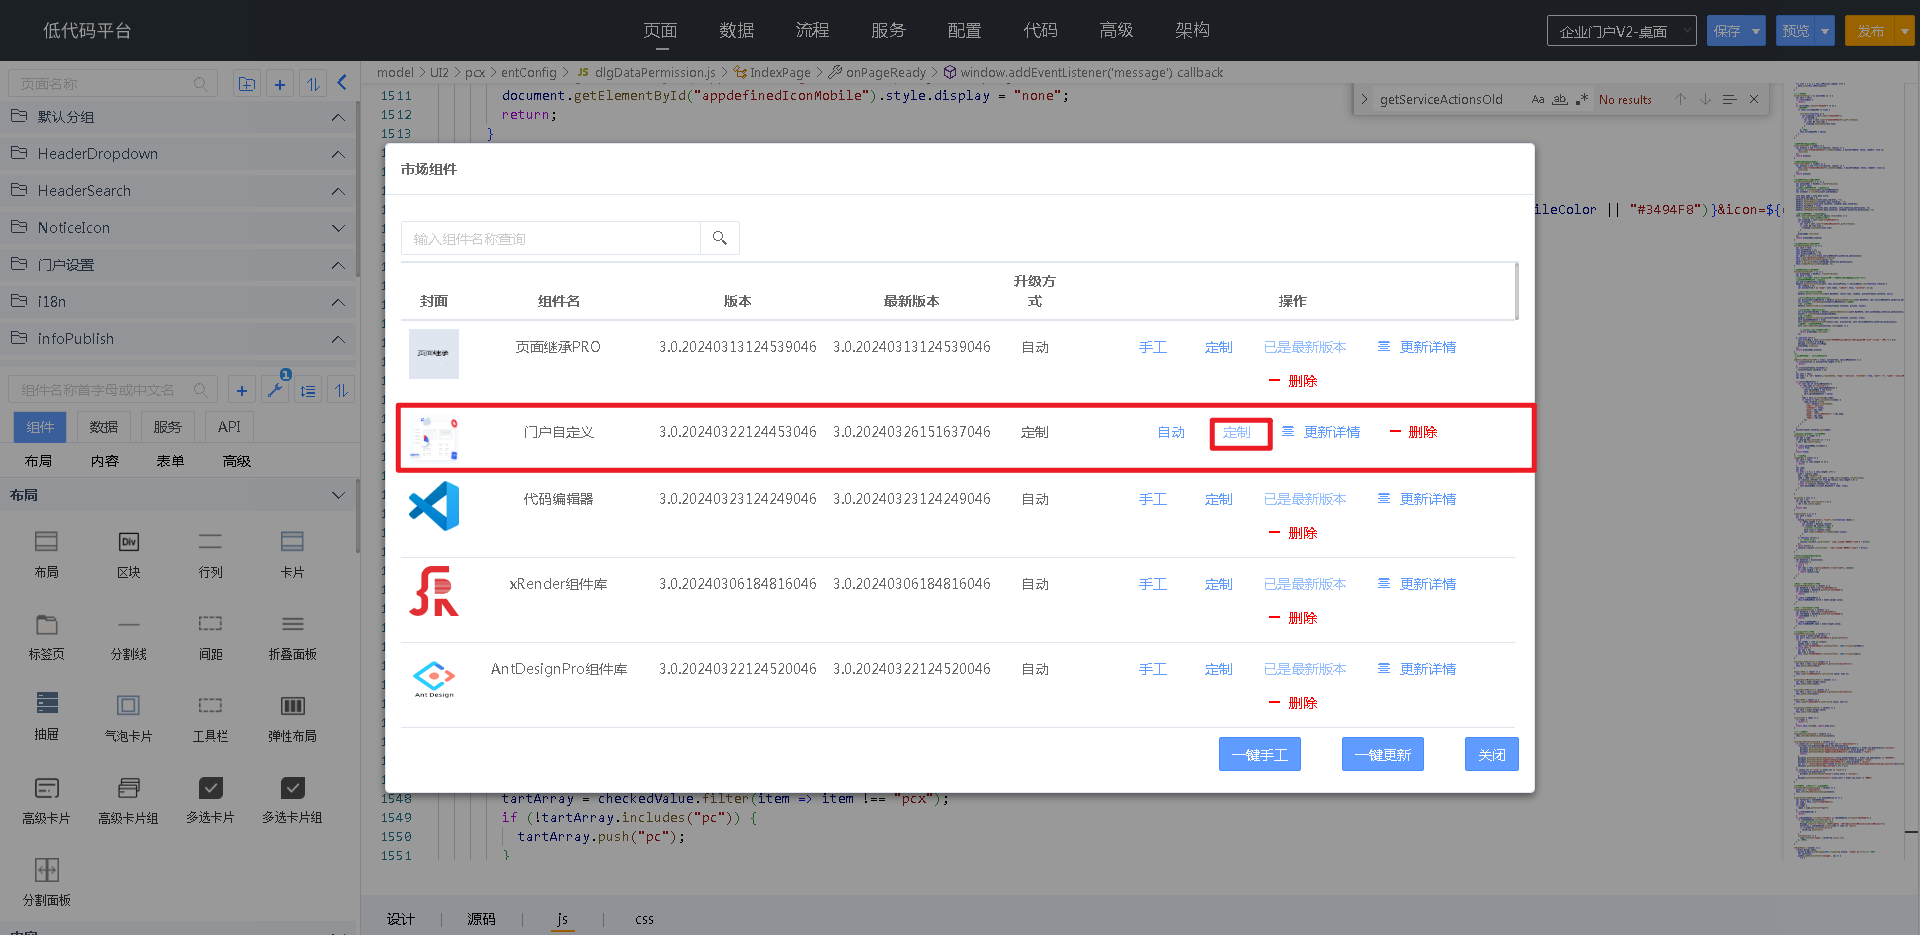
- 新增“ 门户自定义 ”组件,并开启组件定制
- 在门户自定义组件下,新增自定义登录服务
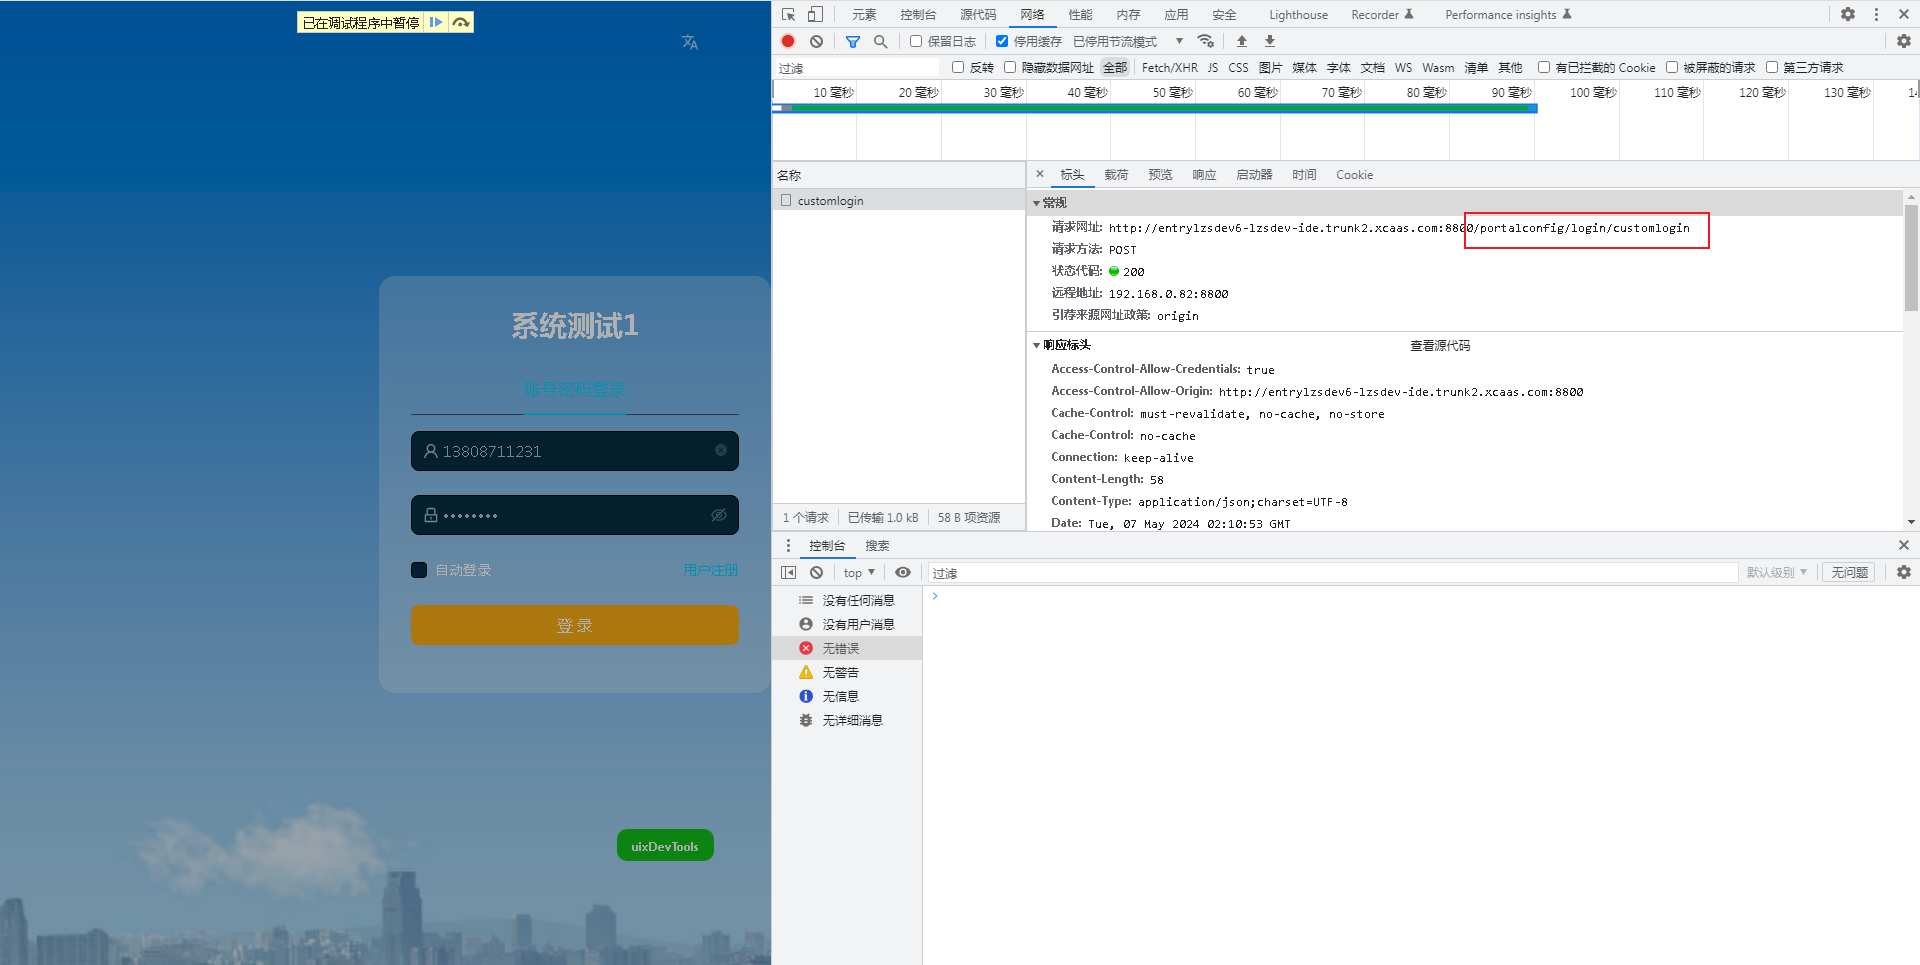
- 在门户自定义组件中修改"$.config.components.uixContainer.UserImplement.loginUrl"为调试好的登录接口
实现步骤
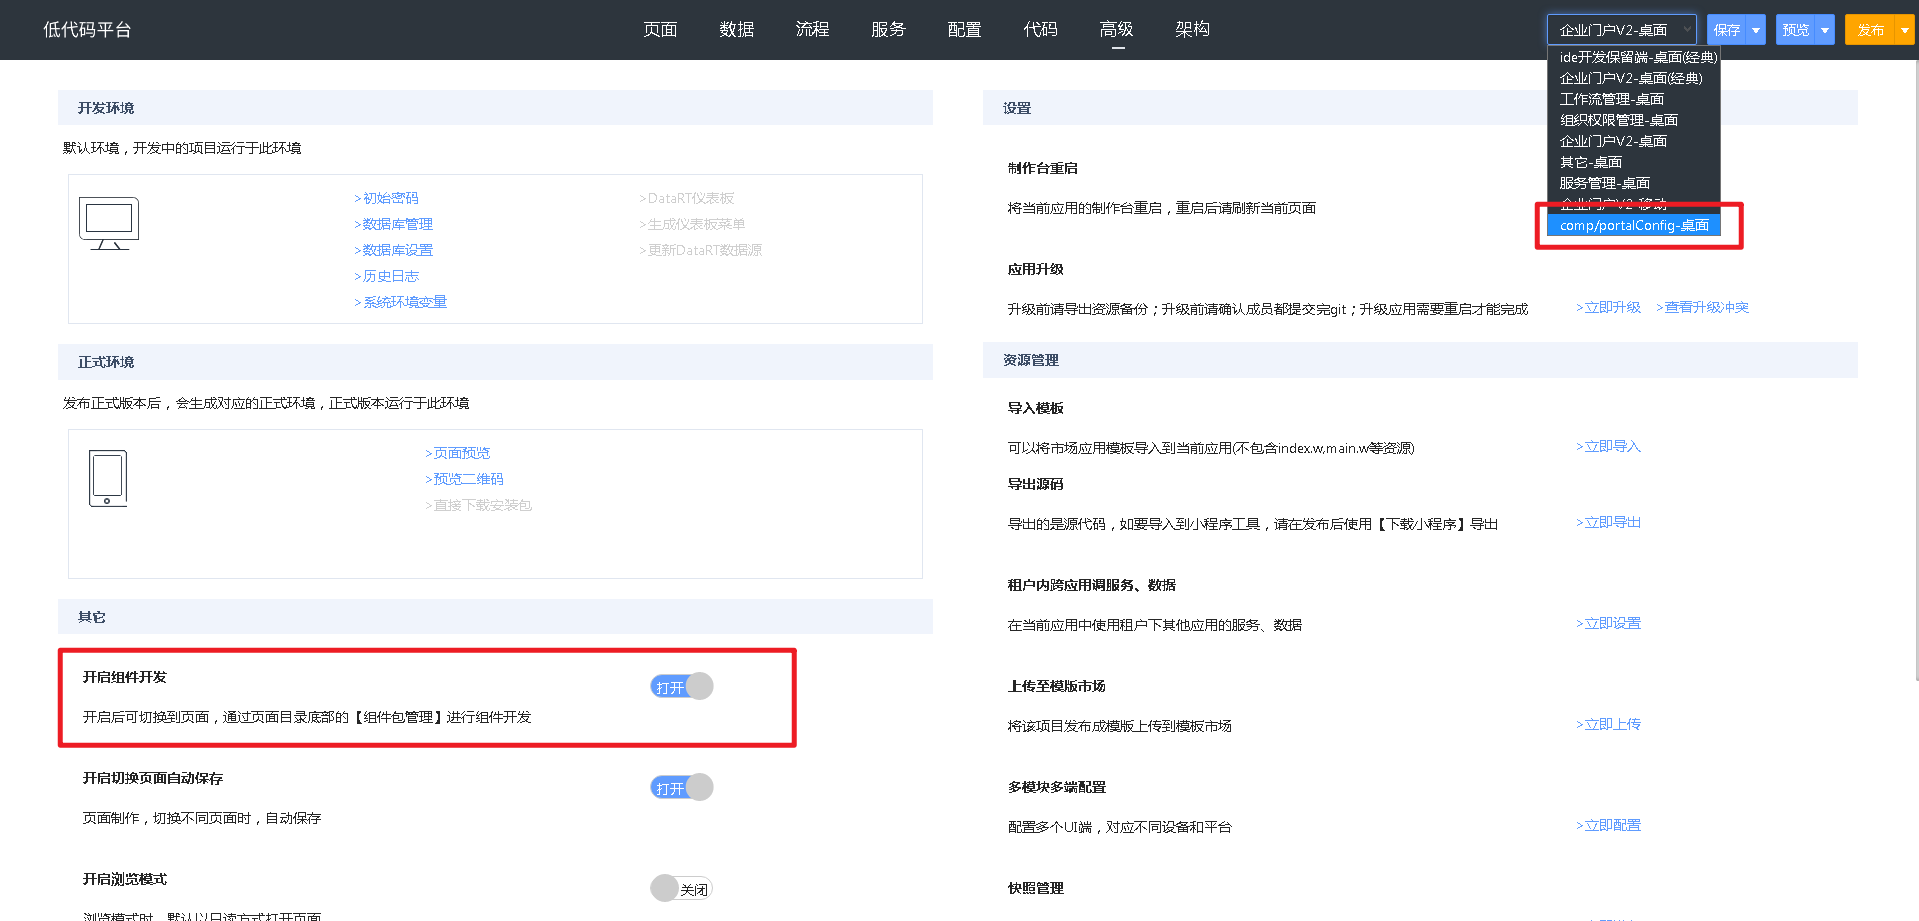
使用租户管理员登录系统,在“应用/服务管理”企业门户V2,开启门户定制(详细操作步骤可参考 门户V2调试)
进入云端开发后,打开市场组件“门户自定义”,并开启组件定制
在云ide"高级"下开启组件开发,并切换到组件开发端,再在“服务”新增登录接口“customLogin”,如下图所示:
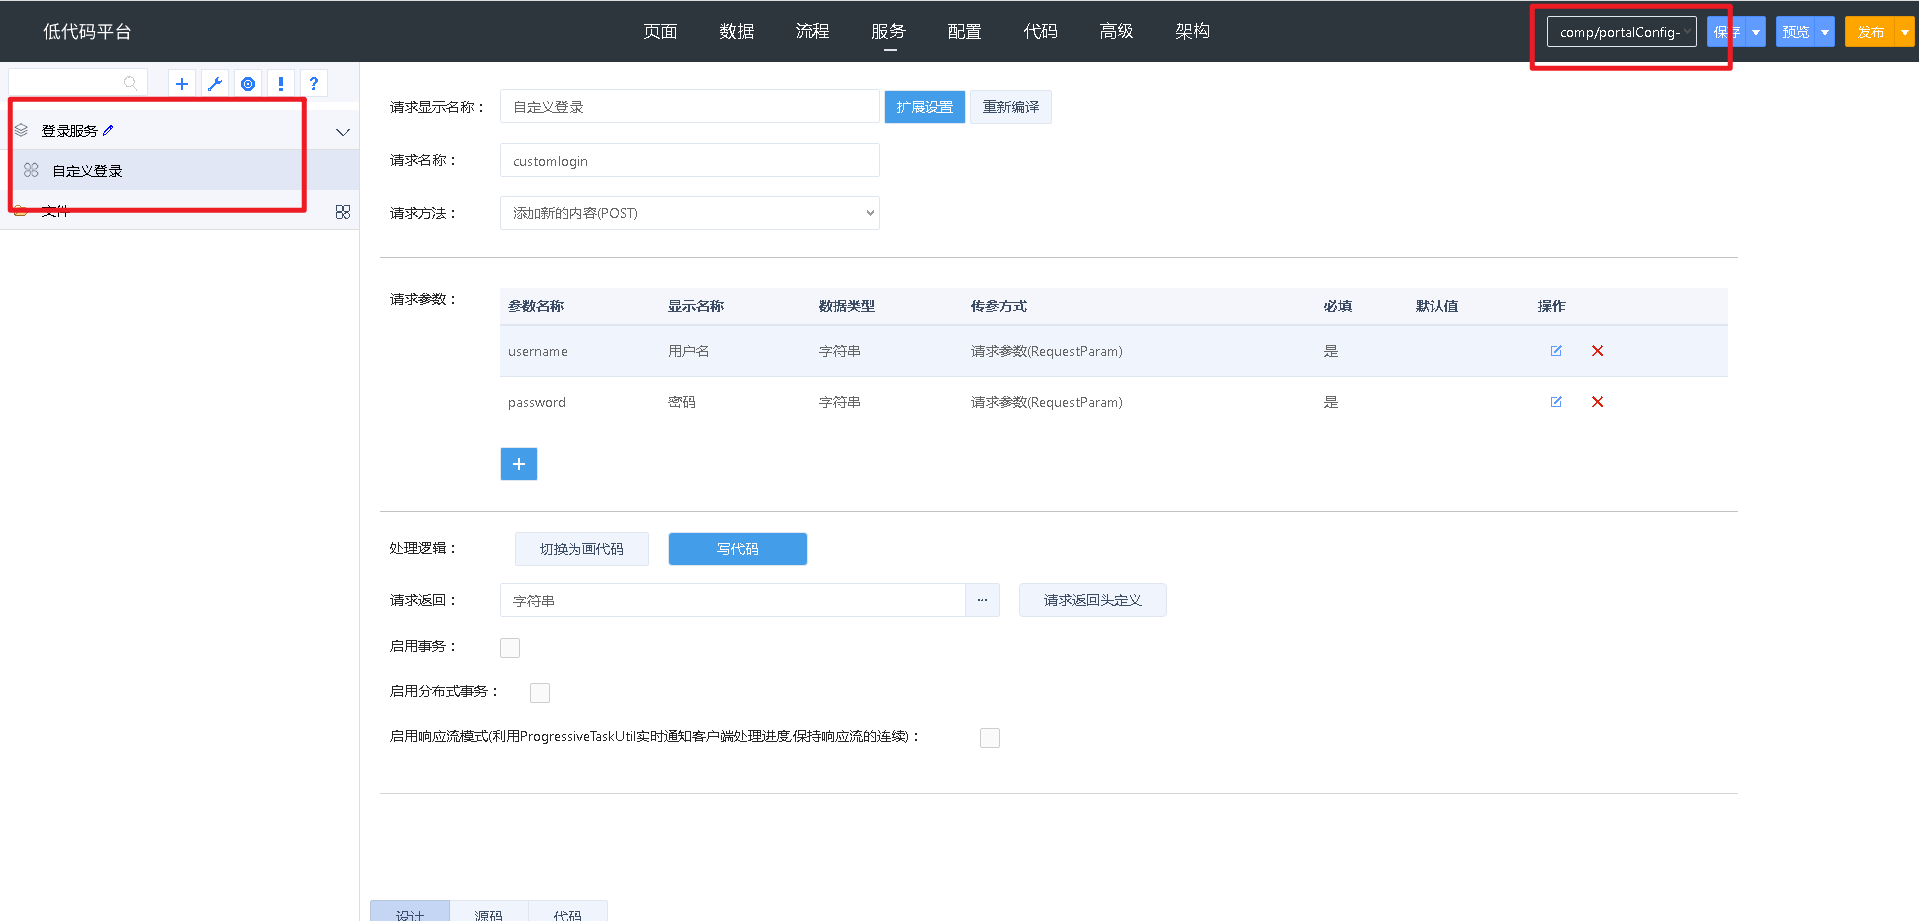
注意: 服务对应的请求地址实际使用时都是小写,详细请求地址请参考controller
对应后端代码如下图所示:
public String customLogin(String username,String password) throws Exception { // 请添加你的业务代码 // 密码解密 password = PasswordUtil.decode(password.trim()); // 用自己的方式验证username和password,不满足抛异常throw new BaseRuntimeException // 获取用户信息 JSONArray users = ServiceUtil.get(SpringWebUtil.getRequest(), "entry", "/uaa/dbrest/users?phoneNumber=eq." + username, null, JSONArray.class); if (users.size() == 0) { throw new BaseRuntimeException("001", HttpStatus.UNAUTHORIZED.value(), "手机号不存在", null); } JSONObject user = users.getJSONObject(0); String user_id = user.getString("id"); String user_name = user.getString("username"); // 获取token String credentialToken = ContextUtil.getEnv("CREDENTIAL_TOKEN"); String token = ServiceUtil.post(SpringWebUtil.getRequest(), "entry", "/uaa/sso/token?username=" + user_name + "&credentialToken=" + credentialToken, null, String.class); // 使用token登录 String session = AuthUtil.tokenLogin(ServiceUtil.getServiceUrl("entry"), token); if (StringUtils.isNotEmpty(session)) { HttpServletResponse response = SpringWebUtil.getResponse(); Cookie cookie = new Cookie("user_session", session); cookie.setHttpOnly(false); if ("https".equals(ContextUtil.getProtocol())) { cookie.setSecure(true); } cookie.setPath("/"); cookie.setMaxAge(60 * 60 * 8); response.addCookie(cookie); JSONObject jsonObject = new JSONObject(); jsonObject.put("user_id", user_id); //自定义获取第三方token逻辑 jsonObject.put("token", "第三方token"); return jsonObject.toJSONString(); } else { throw new BaseRuntimeException("001", HttpStatus.UNAUTHORIZED.value(), "用户登录失败", null); } }在“\UI2\comp\portalConfig\components\portalConfig”组件目录下,定制文件“portalConfig.config.js”(文件命名:组件名+“.config.js”,不能随便定义),文件内容如下所示:
import { merge } from "lodash"; import ConfigContextProcessor from 'core/framework/ConfigContextProcessor'; import React from 'react'; import URI from 'urijs'; import store from 'store'; export default { processConfigContext(configContext) { }, //递归处理数据 dfsFindClass(data, condition, doSomeThing) { for (let i = 0; i < data.length; i++) { let item = data[i]; if (item.hasOwnProperty("children")) { item.children = this.dfsFindClass(item.children, condition, doSomeThing); } else if (condition(item)) { doSomeThing(item); } } return data; }, //自定义 async onConfigContextInit(configContextProcessor) { //获取当前页 let _this = configContextProcessor.page; //按照需要处理的文件路径及方法进行自定义 //@after:方法执行后执行;参数:(result,...args),其中result是方法返回数据,args是原方法自带参数 //@before:方法执行前执行;参数:(...args),其中args是原方法自带参数 //@replace:替换原方法;参数:(...args),其中args是原方法自带参数 //注意:上述3中方法,async标识必须与原方法同步,即原方法是异步,现在自定义方法才能使用异步,否则不能使用 //详细使用案例可以参考“帮助中心”下门户v2定制下相关案例 let portalConfig = { "config": { "components": { "uixContainer": { "UserImplement": { //设置登录url "loginUrl": "/portalconfig/login/customlogin",//注意请求地址大小写,系统默认都是小写 //处理登录返回数据 "loginResultProcess":(res)=>{ //获取登录返回的数据 store.set('thirdToken', res.data?.token) } } } }, "/entry": { "/pcxapp": { "/pcx": { "/index.w": { "onProcessMenu": ({ menus }) => { this.dfsFindClass(menus, item => item.url?.indexOf("token") > -1, item => { //获取平台token并进行参数修改 let uri = new URI(item.url); const { token } = uri.query(true); if (token) { uri.setQuery({ token2: token }); //设置第三方系统登录反馈的token信息 uri.setQuery({ token: store.get("thirdToken") }); } item.url = uri.toString(); }) return menus; } } } } } } }; //处理自定义内容 merge(_this.configContext, portalConfig); ConfigContextProcessor.enhancePageAdvice(_this); } }“门户自定义”组件定制完成之后,重新发布即可