接收通知
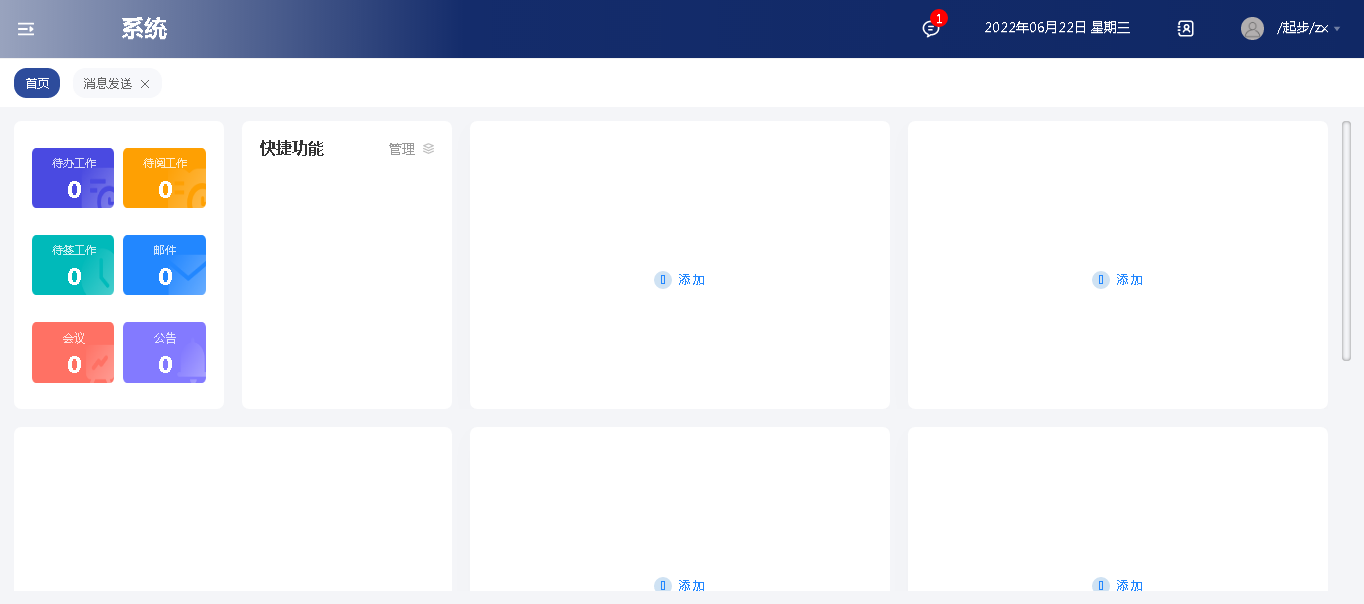
从39版本开始,门户提供接收通知功能,在门户的右上角日期时间的左边,增加了一个通知图标,有新通知时显示新通知数量,如下图所示
点击通知图标,打开通知栏,里面显示通知列表,新通知数量清零
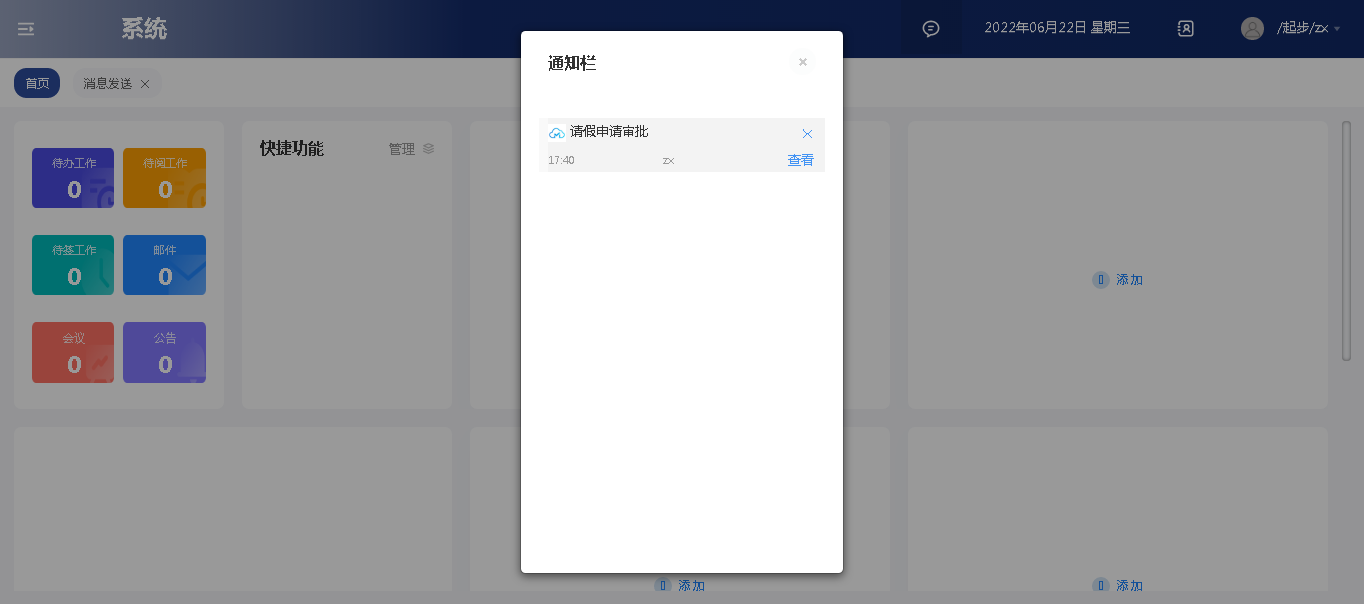
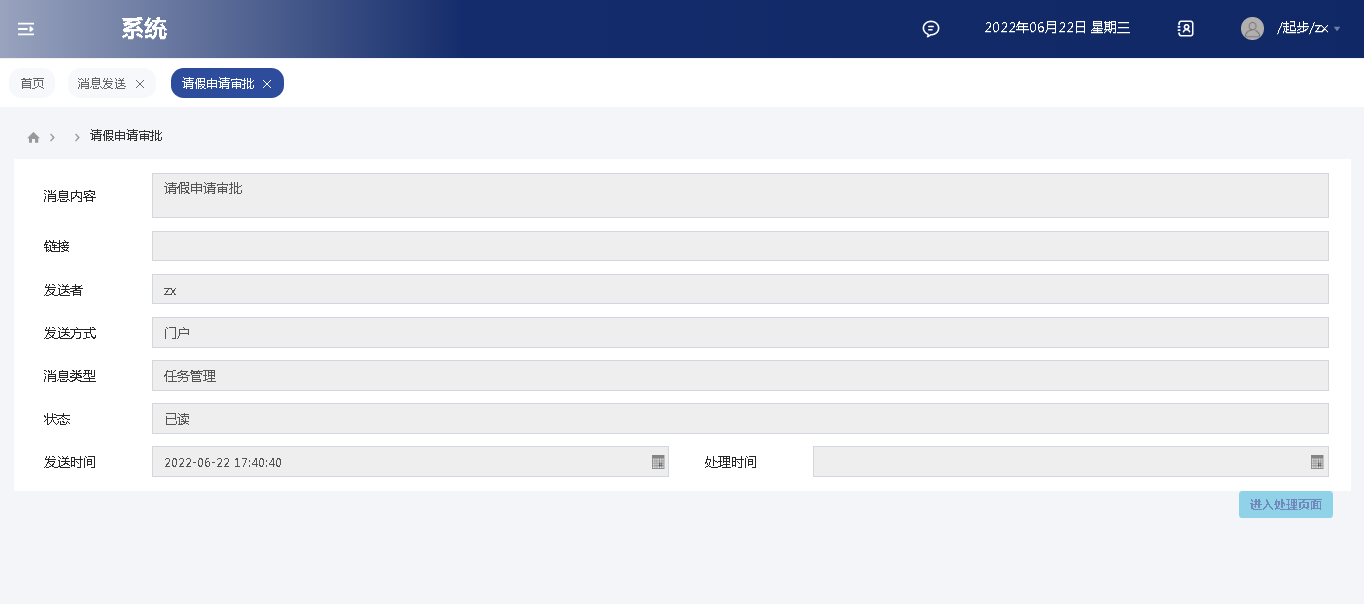
点击某个通知的查看按钮,打开消息查看页面
查看和关闭过的通知,不再显示在通知列表中
1 实现门户接收通知
用租户管理员登录控制台,在应用服务管理中添加消息中心和事件中心两个应用,打开正式环境的门户,在服务注册功能中点击自动发现并注册。
特别注意
- 在添加事件中心前,确保租户中有已分配的redis,或系统中有可分配的redis
- 注册后需要重启事件中心应用。
添加可分配的redis的步骤如下:
- 用system登录控制台,进入资源管理-中间件管理-redis管理
- 点明细-新建,输入数量
- 应用模板选择redis服务
- 租户选择redis
- 部署集群选择rediskube
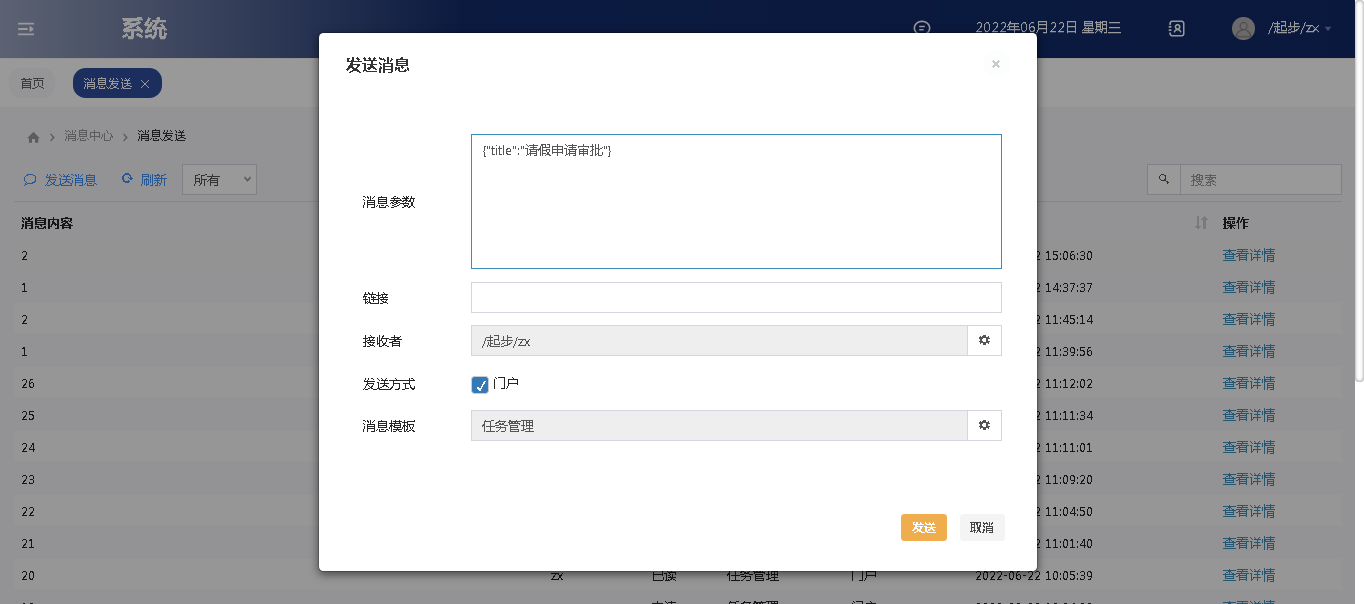
2 测试发送通知
用system或分配了消息管理员的用户,登录门户,打开消息中心的消息发送页面。如果使用任务管理这个消息模板,消息参数为{"title":"1"}格式,选择一个接收者,即可发送通知。
3 自定义接收通知
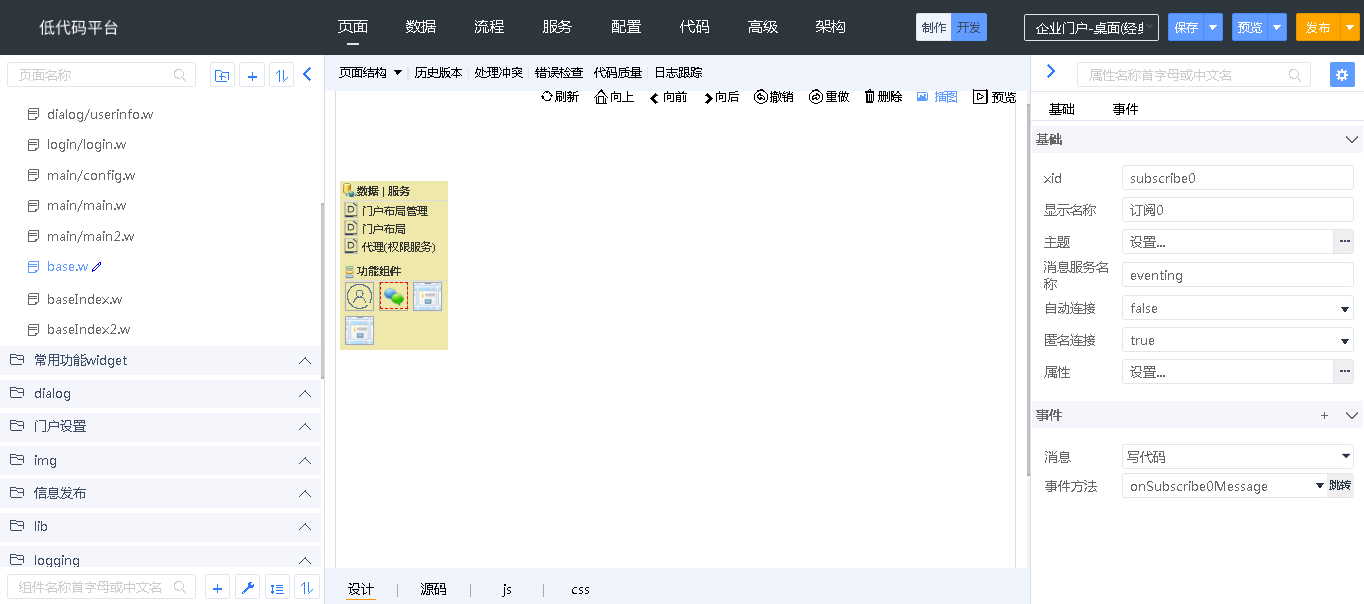
系统在UI2/pc/base/base.w页面中添加订阅组件subscribe0,用于接收通知
当新通知到达时,会触发 onSubscribe0Message 事件,事件中event.message.data是JSON数组,格式如下
    [{
        "title": "标题",
        "content":"内容",
        "submitTime":"2022-6-22 10:11:22",//发送时间
        "submitter": "system",//发送者
        "receiverId":"system",//接收者ID
        "type": "default",
        "picUrl": "/message/pcapp/pc/images/message.jpg",
        "url": "/message/pcapp/pc/viewMessage.w?code=1XczCte1LC4MjQLzkIN",//查看url
        "messageCode": "1XczCte1LC4MjQLzkIN",
        "template": "C9DD8E2232100001B5FBF3EAAEFF2F70"
    }]
base.js中的onSubscribe0Message方法如下,如需改造,可在UI2/pc/index.js中重写此方法。
Model.prototype.onSubscribe0Message=function(event){
    var self = this;
    var count = self.notificationCount.get();
    count = count ? count + 1 : 1;
    self.notificationCount.set(count);

    var notifications = justep.Util.getGlobalValue("portal.notifications");
    if(!notifications) notifications = {rows:[]};
    var notification = event.message.data;
    for(var i=0;i<notification.length;i++){
        notification[i].id = justep.UUID.createUUID();
        notification[i].time = Common.processTimeShow(notification[i].submitTime);
        notifications.rows.unshift(notification[i]);
    }
    justep.Util.setGlobalValue("portal.notifications", notifications);
}
在base/baseIndex.w和baseIndex2.w中增加了通知图标
在base/baseIndex.js和baseIndex2.js中增加了点击通知图标,打开通知栏的代码
通知栏是UI2/pc/dialog/notification.w页面,继承自UI2/pc/base/dialog/notification.w,不要修改UI2/pc/base/dialog/notification.w页面,可修改UI2/pc/dialog/notification.w页面。